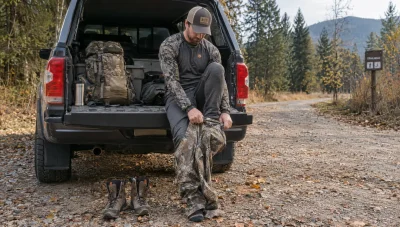
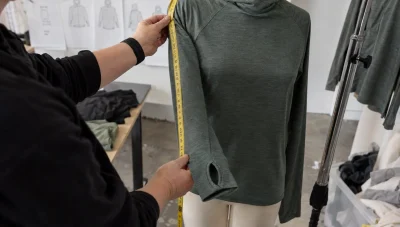
Sublimation is one of the cleanest ways to translate a digital design into a high-impact garment, especially when you want all-over color, sharp details, and a print that will not crack or peel. But the results depend less on “having a cool graphic” and more on running a consistent design-to-print workflow, with the right file setup, fabric selection, pattern strategy, and quality checks.
This guide walks through a practical, production-minded workflow to create apparel with sublimation, from first design files to final inspection, so you can avoid the most common (and expensive) surprises.
Why sublimation workflows fail (and how to prevent it)
Most sublimation issues are not “printing problems.” They are workflow problems, where one step assumes something that the next step cannot deliver.
Common examples:
- A designer builds a black-heavy print expecting deep blacks, but the fabric, ink limits, and heat settings produce a dark charcoal.
- Artwork is approved on a monitor without color management, then looks oversaturated or shifted on polyester.
- A pattern is finalized before print placement is engineered, so logos land in seams, get stretched, or disappear into underarm panels.
- Sewing teams are not given print alignment references, so mirrored panels or mismatched stripes show up in production.
A strong workflow solves these issues early, before you pay for yardage, print time, or labor.
Sublimation apparel types that benefit most from a disciplined workflow
Sublimation shines when the print is integral to the product, not an afterthought.
Typical best-fit categories include:
- Performance activewear (leggings, tops, teamwear)
- Swimwear and compression garments
- Cycling jerseys, running singlets, rash guards
- Fashion pieces with engineered placement prints
If you want a broader overview of pros, cons, and best-use cases, Arcus also covers that in Benefits of Sublimation for Apparel.
The design-to-print workflow: from concept to finished garment
Below is a production-ready workflow used by many cut-and-sew programs that rely on sublimation.

Step 1: Start with the end garment (not the artwork)
Before you open Illustrator or Photoshop, define the garment realities:
- Fabric composition (sublimation typically requires polyester or a coated substrate)
- Fabric weight and stretch (affects how print appears when worn)
- Construction (panel count, seam placement, binding locations)
- Intended fit (compression vs relaxed, which changes how the print visually expands)
If you are early in product development, it helps to align on the construction method as well. Sublimated apparel is often produced as print, cut, and sew, which is discussed in more detail in Arcus’s overview of cut-and-sew clothing.
Step 2: Choose your sublimation approach (and lock it in)
There are two common production approaches, and they drive very different file needs.
| Approach | What gets printed | Best for | Key risk if you choose wrong |
|---|---|---|---|
| Cut-part sublimation (most common for custom cut-and-sew) | Pattern pieces (front, back, sleeves, gussets) | All-over prints, engineered placement, performance apparel | Misalignment at seams if patterns/placement are not engineered |
| Finished-garment sublimation | Pre-sewn blank garment | Smaller graphics, simpler placements | Harder to control placement and even pressure on seams |
If you plan custom apparel with consistent results, most brands end up in cut-part sublimation because it gives you control over placement, repeats, and seam matching.
Step 3: Build production-safe art files (preflight standards)
Sublimation reveals file problems fast. Set standards before your first sample so you are not reinventing the wheel each season.
Key “preflight” items to align with your printer/manufacturer:
| File topic | What to decide | Why it matters |
|---|---|---|
| File format | AI/PDF for vector, PSD/TIF for raster (as agreed) | Prevents missing links, font issues, and unexpected rasterization |
| Resolution (raster) | Common production target is 150 to 300 DPI at print size | Too low blurs, too high can slow RIP without improving output |
| Color mode | Your partner’s preferred workflow (often RGB input converted through RIP profiles) | Controls color conversions and reduces “why does it look different?” problems |
| Black strategy | Define “rich black” recipe vs single-channel black | Avoids washed blacks or muddy darks |
| Transparency and effects | Flatten as needed | Prevents RIP surprises like banding or artifacts |
| Fonts | Outline or package fonts | Avoids font substitution |
Tip: Approve colors and critical artwork using physical strike-offs (small test prints) on the actual fabric. Monitor-only approvals are one of the top causes of rework.
Step 4: Engineer print placement on the pattern (the make-or-break step)
“Engineered placement” means the print is designed to match the pattern pieces, not just tiled across fabric.
This is where you solve issues like:
- Centering chest logos on a curved front panel
- Keeping stripes continuous across side seams
- Controlling what happens at hems, zippers, and binding
- Avoiding awkward placements in high-stretch zones
A practical workflow looks like this:
- Finalize base pattern and size set (at least your sample size).
- Place artwork on each pattern piece (front/back/sleeves/gussets) with match points.
- Add bleed beyond cut lines so you do not get white slivers after cutting.
- Mark grain/stretch direction so artwork does not end up rotated.
If you work with a manufacturer, this is also where a clear tech pack reduces confusion. If you need a refresher on what belongs in one, see What is a tech pack?.
Step 5: Plan for seam behavior, stretch, and “optical distortion”
Even with perfect printing, a design can look wrong once worn because stretch changes scale.
Production-minded adjustments include:
- Avoid placing tiny text across high-stretch areas (like hips or seat panels on leggings).
- Expect geometric patterns to “open up” on compression zones.
- Be careful with face graphics near seams and curves (they can warp quickly).
If your product will be worn under tension (performance leggings, compression tops), sample fittings should be done with the garment worn as intended, not laid flat on a table.
Step 6: Sampling: confirm color, hand feel, and construction together
Sampling is not just for fit. For sublimation, sampling validates the full system:
- Fabric and pretreatment (if applicable)
- Ink behavior on that fabric
- Heat/pressure/dwell time settings
- Sewing thread, needle choice, and seam finish (which can affect puckering and print alignment)
At this stage, it is smart to define what counts as “pass/fail” for:
- Color tolerance (especially for brand colors)
- Alignment at seams
- Visible white lines at edges
- Scorching, shine, or heat marks
Step 7: Bulk production: control variables that change color
Sublimation color is sensitive to process conditions. During production, consistency is the goal.
Variables to control:
- Fabric lot consistency (poly blends can vary)
- Press temperature, pressure, and dwell time
- Transfer paper handling and storage conditions
- Humidity (can affect paper and transfer behavior)
Even if you are not running the machines yourself, your workflow should include a checkpoint to confirm that bulk production settings match what was used for the approved sample.
Step 8: Cutting and sewing: align prints like you mean it
Cut-and-sew sublimation is where great programs separate from average ones. The cutting and sewing teams need the right information to reproduce alignment.
Common production practices include:
- Using notches and match points consistently
- Keeping mirrored pieces clearly labeled (left vs right)
- Bundling cut parts by size and style to avoid mix-ups
- Checking seam alignment early in the sewing line, not only at final QC
A helpful rule: if your brand is selling “engineered prints,” treat print alignment as a quality requirement, not a “nice to have.”
Step 9: Finishing and care labeling: protect the print and the customer experience
Sublimation prints are fused into the fibers, but your garment still needs finishing discipline.
Make sure you align on:
- Final pressing/steaming limits (excess heat can create unwanted shine on some fabrics)
- Wash testing for colorfastness and appearance retention
- Care labels that reflect the actual fabric and construction
If your product includes additional branding like woven labels, heat transfers, or neck prints, confirm that those decoration methods will not interfere with sublimated areas.
Step 10: Quality control: inspect what customers actually notice
Sublimation QC should include both technical checks and “customer-eye” checks.
| QC area | What to inspect | Typical issues caught |
|---|---|---|
| Print quality | Banding, ghosting, muted color, unexpected hue shift | RIP/profile mismatch, press inconsistency |
| Edge coverage | White slivers at cut edges, insufficient bleed | Cutting tolerance, missing bleed |
| Placement | Logo centering, repeat consistency, symmetry | Pattern-art mismatch, cutting/sewing drift |
| Seam matching | Stripes/pattern continuity | Notches ignored, piece mixing |
| Fabric damage | Scorching, shine, press marks | Excess heat/pressure, wrong press settings |
Pro tip: Do not only QC garments laid flat. Check on-body stretch zones (hips, chest, elbows) where distortion and whitening are more visible.
A realistic timeline: what slows down sublimation programs
Sublimation can be fast, but engineered prints add development steps. What typically adds time:
- Multiple rounds of placement revisions
- Waiting on physical strike-offs for color approval
- Pattern changes after artwork placement is finalized
- Fit changes that require re-engineering print files
Brands often speed things up by locking the “foundation” first (fabric, base pattern, sizing), then iterating on prints.
Troubleshooting guide: quick diagnosis of common sublimation problems
| Symptom | Likely cause | What to try next |
|---|---|---|
| Colors look dull | Wrong profile/settings, unsuitable fabric, insufficient heat | Test on correct fabric lot, confirm press settings and RIP profile |
| Blurry edges | Low resolution art, movement during transfer | Increase source resolution, improve paper handling and press stability |
| Ghosting/shadow | Transfer shifts during pressing | Secure transfer better, review press opening/closing technique |
| White lines at seams | Not enough bleed, cut/sew tolerance | Add bleed, refine cutting accuracy, add match points |
| “Washed” blacks | Black recipe not optimized for sublimation | Define a production black strategy and approve via strike-off |
If you already know sublimation is the right method but want help selecting the best production setup (small batch vs scale, domestic vs international), Arcus covers decision factors in its small batch manufacturing guide.
Frequently Asked Questions
What file format is best for sublimation printing on apparel? Vector files (like AI or print-ready PDF) are ideal for logos, type, and sharp shapes. High-resolution raster files (like PSD/TIF) are often used for photographic prints. The best choice depends on your printer’s RIP workflow, so align on a standard early and keep it consistent across styles.
Can you sublimate on cotton? Traditional dye sublimation works best on polyester (or coated substrates). If your product needs a cotton feel, many brands explore poly blends or alternative print methods, depending on the desired hand feel and performance.
How do I avoid white edges on sublimated cut-and-sew garments? Build in bleed beyond cut lines, confirm cutting tolerances, and ensure the artwork is engineered to each pattern piece. White edges are usually a planning issue, not a “printer issue.”
Do I need a tech pack for sublimation apparel? Yes, especially for engineered prints. A tech pack helps align artwork placement, measurements, construction details, trims, and labeling so your sample and production runs match your intent.
Is sublimation good for small batch production? It can be, particularly when you want design variety without screens and when your program is built around polyester performance fabrics. Sampling and color approval still matter, so plan for at least one development round.
Create sublimated apparel with a production partner who can manage the full workflow
If your goal is to create apparel with sublimation and you want fewer surprises between design and delivery, the biggest lever is having one accountable workflow across development, sourcing, printing, and cut-and-sew.
Arcus Apparel Group supports brands with end-to-end apparel development and manufacturing, including dye sublimation printing, material sourcing, pattern development, small batch options, and quality control at each stage.
To discuss your concept, fabric direction, and the right sublimation workflow for your product, start here: Arcus Apparel Group.